Rules and generic rules components (preview)
What is the goal of the game ?
⭐ Reaching for the stars ⭐
As the main characters of a high fantasy saga, your party of heroic and powerful warrior-mages will travel from chapter to chapter to carry out an epic quest.
Each chapter takes place in a different setting, that the heroes will explore to find the objectives hidden within; obtaining the cards featuring these objectives will be the key to victory !
You will use a different “story deck” for each chapter, from which you will draw in various circumstances : performing special actions, entering specific locations, vanquishing unique enemies… Some of these cards display a « star » icon.
/pic5796747.png) A red star provides insight into the main objective followed by your heroes.
A red star provides insight into the main objective followed by your heroes.
/pic5796760.png)
A black star is a side objective, a valuable progress about another aspect of the story.
Whenever you draw one of these, it means that your party accomplished the corresponding objective. Depending on the chapter and the player count, you will have to achieve a certain amount of objective.
For instance, in the prologue to our saga (played in conventions to avoid spoiling the main game), this chart is revealed at the start of the adventure:
/pic5796736.jpg)
Depending on the number of players, you will have to collect from one to four stars. One red and a variable amount of black ones.
I.e. A 3-player team will have to find one red star and two black stars hidden in the ruined fort.
These stars have to be found before the threat level is too high or the party is too exhausted to keep going… We’ll reveal more on that in a future post, but you are basically on a timer: heroes do not have time to lose!
As soon as you find all the required stars for your party, it’s a win! At the end of the round you stop the game (even if you were still low on the threat level scale and/or had enough vitality left), as your heroes leave the setting with all the required information to progress confidently towards the perils of the next chapter. No need to keep looking around, it’s time to move on!
However, if time runs out before this happens, you can find yourself in two different situations:
- if you haven’t collected the red star(s), unfortunately, it is a complete defeat. You didn’t find what you were looking for, and have to start the chapter over.
- if you didn’t get all the required black stars but STILL managed to complete the main objective by collecting the needed red star(s), you did achieve your goal… With a bittersweet taste. The chapter will let you know what happens in that case, and what dire consequences you will have to face in the next chapter. You don’t have to start over, but some changes will affect the story ahead, potentially making your life a little bit harder.
As the stars are hidden in the various locations of the setting, there is no specific order to collect them. You can accomplish your main objective before looking around for extra information, or gather all the sides bits of knowledge before jumping on the main story plot!
A chapter is usually played in one single game session. There are more hidden side objectives than the number required by the chapter, and the fact that you have a limited amount of actions to explore the labyrinthine setting means that it will be very hard to reveal everything in one attempt. Whether you win the chapter, barely make it or have to start it over, you will always discover new things when you will delve into this setting once more!
Exhaustion and Threat Level
In soul Raiders, we use a game board to keep track of these two parameters. You can see a WIP (but very advanced) version below.
:strip_icc()/pic5815958.jpg)
Vitality Track and exhaustion
The first thing that can puts and end to the chapter is the vitality of your party of adventurers.
The Soul Raiders are exceptional warrior-mages with a special connection between them, and a strong sense of the group: no one is left behind. Therefore, life is treated as a common pool: whenever one player takes damage, the whole group loses vitality points. These vitality points are displayed on a circular track (surrounding the main board, see picture above) ; each time you lose some, you will move a token along the track, until you reach zero.
:strip_icc()/pic5815959.jpg)
Whenever the group reaches zero vitality points, the whole party begins to feel the strain of their mutual effort in front of many dire obstacles. Starting next round and moving forward, all players will have one less action card in hand at the start of the turn (more on these action cards in a future post — they are key to explore the chapter).
Once the vitality token reaches zero, however, it keeps moving on the circular track! It then goes from zero to thirty (the maximum amount of vitality for a group), and will progress along the track until it reaches zero again, where the group will lose one more card, and so on and so forth.
The adventurers start the game with four action cards in hand ; if they lose all their vitality while they have only 2 cards in hand, they are too exhausted to keep going, and have to retreat with the information they gathered ; the game session is over at the end of the current round.
:strip_icc()/pic5815963.jpg)
Running around and chasing quests is hard work ; at the end of each round, the characters also suffer automatic “stress” damage, depending on the current threat level (see below). Better find these stars quick !
Threat Level
The second menace looming over the characters is the threat level. It symbolises the awareness of the enemies during this chapter and their aggressivity, as a band of powerful heroes is actively trying to ruin their plans!
The threat level is a track divided into three sections: low threat, medium threat and high threat. Each time the threat level increases by X, the threat marker is moved up by that many spaces. The potency of the consequences that the players will suffer correspond to the section where the marker is.
:strip_icc()/pic5815961.jpg)
When the threat is low, you automatically lose 2 vitality points at the end of each round due to stress, each relevant creature icon will spawn 2 generic creatures, and each relevant damage icon will inflict two vitality points. As you can see on the picture above, this goes up to 3 and 4, making it harder to progress as more and more enemies gather to block your path !
The threat level increases either when a threat level card is drawn from the generic creatures deck (the more creatures you have to draw and the more likely they are to ring the alarm!), but also in some specific (and dangerous) locations, and on scripted story cards.
:strip_icc()/pic5815965.jpg)
When the threat level reaches the last space of the track, the chapter is over ; again, the soul raiders cannot move forward and must fall back with the informations they collected.
As you can see in the picture above, the end of the threat level track and the exhaustion track are at a crossroads, because any of these conditions will stop the game — no matter where you stand on the other track. As we saw last week, stopping the game is not synonymous with defeat: if you collected all the red stars, you will still proceed to the next chapter of this epic story!
Being mindful of the threat level and its implications while staying in good health requires you to make tough choices, gauge the tempo of the game and take the right risks to achieve your quest as a skilled Soul Raider !
Action phase
A game session of soul raiders (or “Chapter”) is a succession of rounds, each round being divided in two phases: the action phase and the reaction phase.
The number of rounds is not definite, it will go on until the end game conditions are met — either by a glorious win, a narrow victory with a bittersweet taste, or a crushing defeat. Whenever these conditions are met, the session stops after a last reaction phase, and heroes proceed to the next chapter of the Quest, according to their result.
Action phase
This is the phase where the players act, as they evolve in the chapter to accomplish their objectives.
One of the most important things to note is that there is no turn order here, every group of players can evolve at its own pace. Player A can wait to see how player B actions unfold before playing, while Player C is doing her own thing in another part of the setting, rushing for information (and action! )… As a purely cooperative experience, the group will figure out how they want to play the game, and optimize their actions to progress and/or wait for each other as they see fit.
The Action phase goes on until all players have played or reserved their action cards in hand, then we proceed to the Reaction phase.
:strip_icc()/pic5869365.png)
One of many dangerous encounters – Soul Raiders unique enemy illustration
Type of Actions
Now that this is clarified, lets run you through those famous actions that you can undertake. They can be of four kinds:
- Movement allows you to move from one location to another.
- Combat allows you to get rid of enemies engaged with you and other players
- Aptitude actions are special actions that you will be able to take, depending on the location and/or the story cards. They fall in four categories : Strength, Observation, Precision and Persuasion.
- Spellcasting is… the casting of a spell (!) These have various effects in the game, from a straightforward Fireball to a cunning sneak peek into the future with Foresight, or a charming Enthrall that will numb the mind of your enemies…
The location is the heart of the gameplay, and will show the possibilities currently open to your hero. Let’s have a look at this card, from the prologue :
:strip_icc()/pic5869336.jpg)
Here, you can :
- Move to Location 7 for 6 action points
- Move to Location 1 for 8 action points.
- Take a Precision action to pick a lock and flip the location on its B side, for 5 action points.
- Fight any enemy in this location
- Cast any spell in your hand of cards
Action cards
If you’ve read our earlier posts, you might remember a rule called Exhaustion: the level of Exhaustion dictates how many Action cards you will draw at the beginning of Action phase, from your personal hero deck.
/pic5815965.jpg)
This deck is made of 24 cards and is unique to your character (each hero has its own specificities).
Every player draws those cards at the same time, and — as we mentioned it earlier – can accomplish their action independently from each other.
:strip_icc()/pic5869384.png)
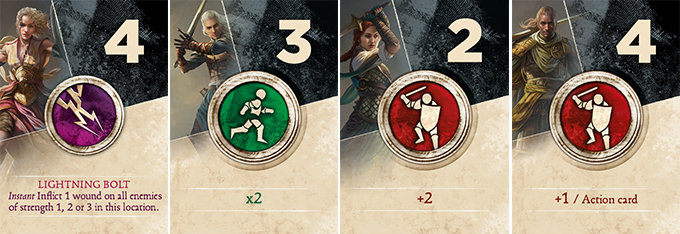
The value of an action card is displayed at its top: here, 4 and 3 respectively.
To accomplish one action, a player can play any number of cards from their hand, as long as its sum matches the target number. When they don’t have any more cards in hand, they cannot play until the next round.
This is where the subtleties of clever hand management comes into play…. Any action card can be played to achieve a Movement, Combat or Aptitude action, BUT these cards come with different bonuses, displayed at the bottom of the card. A player using a card with a Movement bonus (green) or a Combat bonus (red) will only benefit from it if it is played for the corresponding action. Otherwise, simply use the value at the top of the card.
:strip_icc()/pic5869406.png)
Exemple: if we look at the two action cards above, Eneko could use both to total 7 action points for an Aptitude action (4+3), but for a Movement action it would be worth 10 points (4+3+3 bonus) and for a Combat action, 8 points (4+3+1 per combat card played within the action, here it is only one combat card).
In the location 9A above, he would need both cards to pick the lock (without counting a potential hero bonus), he could move to location 7 by playing only his Movement card, or to location 8 by playing both cards – the Combat card on its own isn’t enough for any action displayed here.
A Spell has no bonuses : you can either use the card for its value displayed at its top to accomplish any kind of action, or for its spell effect. It’s up to you to decide whether you shall sacrifice this rare effect to accomplish a more mundane — but maybe vital — feat, or save the spell for later ! You cannot cast a spell with another action card.
:strip_icc()/pic5869323.png)
Any card action played is then discarded in the player’s discard pile, and will come back to their hand only when the draw pile is empty. To spice things up, you have the possibility to reserve up to 3 cards for a later turn: you will then discard the cards that you don’t want, trading them for the ones you saved earlier.
As you can see, choices abound. It might seem to be only a few cards, but the many ways that you can use it to move around in the setting, considering that you can play them in any player order and for any actions, will make for very interesting dilemmas.
Also note that there is no such thing as “trying” to do something in Soul Raiders ; either you succeed in the action (by having and playing the cards), or you can’t attempt it. Those heroes know what they are doing!
Reaction phase
As the game reacts, the heroes find themselve facing stress, injuries, ferocious monsters and many other events that will threaten their progression in the chapter. It is divided into several subphases.
1. Stress
The group loses as many health points as indicated by the current Threat level.
:strip_icc()/pic5899584.png)
It symbolizes the stress and exhaustion that the heroes accumulate as they run, fight and perform heroic feats to complete their quest. This loss cannot be prevented by any means, and as we mentioned in our previous posts, it forces your heroes to be always on the move to complete their quest before it is too late — hiding in safe places won’t help you for long!
2. Status
/pic5899609.png)
The group also loses one health point per poison, fracture and feartoken that they have on their hero boards . Statuses can affect heroes in a variety of ways, and can also be acquired by many different means!
3. Enemies reaction
We’ll delve into combat rules in a future post, but this is when the enemies attack the group ! Some effects might have triggered an early attack from their part during the Action phase (like the Ambush icon), but usually the heroes had a chance to dispatch their foes before they get attacked — if they played their hand well.
:strip_icc()/pic5901533.png)
This rule is pretty straightforward: for each apparent shield on the card of each enemy engaging a hero, the group loses one health point. Some monsters display several shields, others have abilities linked to their attack… Better get rid of these enemies before they get angry !
Exemple: if they were facing the single enemy displayed above, the party would lose two Health points. If the spectre is wounded and one shield is covered by a token, they would lose only one health point. The numbers inside the shields do not matter here.
4. Location reactions
:strip_icc()/pic5901535.png)
Finally, the setting itself reacts to the heroes’ presence. For each location where you have at least one hero, apply the effects triggered by the reaction icons (orange) at the bottom of the location. Players choose the resolution order of the locations, and must apply all the effects (left to right) before choosing another location.
These effects are really varied. You can expect reinforcements as more enemies jump on your party, an alarm that raises the threat level, Story cards to draw, etc. The severity of some these effects are linked to the Threat level. We’ll get back to this when we describe the anatomy of a location.
/pic5901549.png)
Exemple : Let’s look the two orange icons at the bottom of location 6B : the first one is Alert, which moves the threat marker by one on the threat track. The second is Reinforcements, that adds a number of random enemies corresponding to the current threat threshold (2, 3 or 4) — they are drawn from the random enemies draw pile and split between the heroes on the location.
Effects will be resolved from left to right, so if the threat level reachs a new threshold after resolving the Alert icon, one extra enemy will show up with the Reinforcements !
Considering we only take into account the current locations of the player, choosing wisely where to end your hero’s turn is of utmost importance…
Once this last step is completed, the round is over. If the end game conditions are not met, players start a new round, with another action and reaction phase, and so on and so forth.
Locations
We mentioned several times that Locations are at the heart of our game. They are big sheets, 142x200mm, to provide enough space to hold all the informations, the heroes’ miniatures and tokens.
Anatomy of a Location
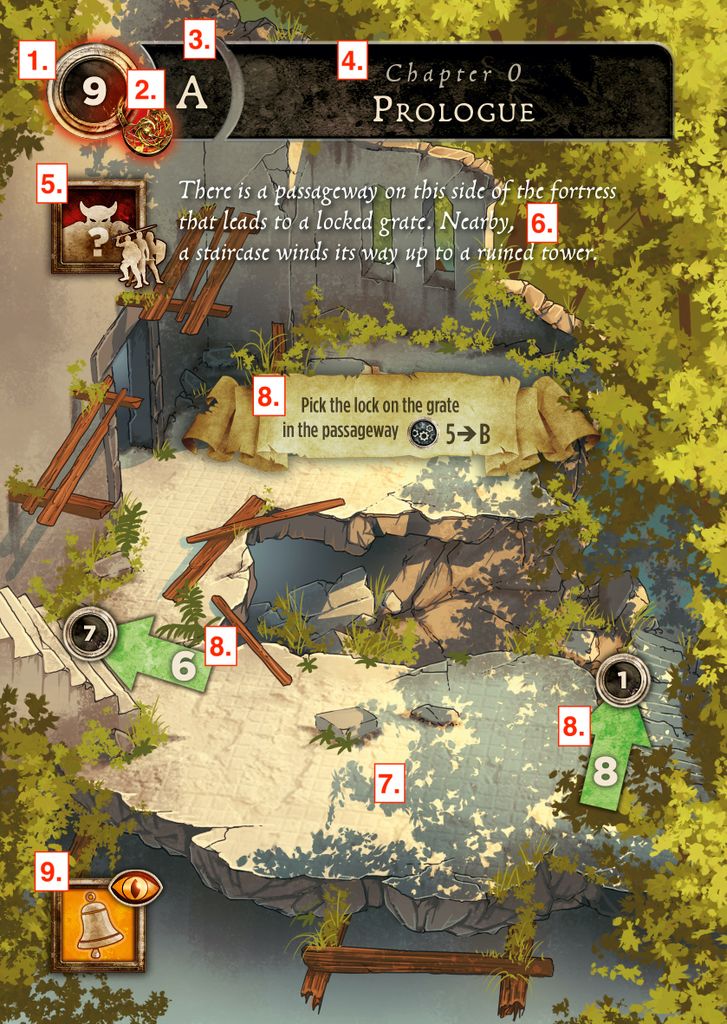
- The Location number. There are around 40 locations per chapter.
- Sometimes there is a padlock displayed. This means that the Location can be flipped to its B side only if specific conditions are met. Reminder : by default, a Location is automatically flipped when you enter for a second time.
- The side of the Location, A or B.
- The header with number and name of the chapter currently played.
- The icons showing the effects triggered by the heroes when they enter the Location. There can be any number of icons, and you resolve them from left to right.
– By default, only the first player to enter apply these effects, but sometimes a “group” symbol indicates that all players entering have to apply those effects.
 – If these icons are Blue, it means that they apply immediately when you flip them on its B side, even if you were already present on the location (if the Location was flipped by an action like the Precision Action of our example, for instance)

– Beside those icons, you might find additional gameplay instructions above it, that you need to apply beforehand. - A flavor text sometimes gives additional information about the feel of the place, events that are happening, or any information that can’t be seen on the picture. It is not always present.
- A pretty picture by Guillaume Tavernier

- The various actions that you can perform in the Location. Here, you can :
– spend 6 action points to move to Location 7
– spend 8 action points to move to Location 1
– spend 5 actions point to perform a precision Action that allows you to pick the grate’s lock, and flip immediately the Location on its B side. - Icons showing the effects triggered by the heroes during the Reaction phase. There can be any number of these, and you resolve them from left to right.
Visibility : some icons display a “Visible” symbol associated with it ; this means that you apply its effect only if you are NOT invisible (a powerful spell!). Being invisible will typically prevent you from falling into traps, ambushes, or raise the alarm, but the applications are many.
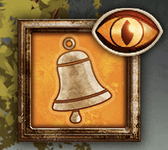
In the Location used here, if you are invisible nobody will see you to raise the alarm!
Effects triggered by entering in a Location
Here is a list of the most common effects triggered when you enter a Location:
 Random enemies : draw a number of random enemies corresponding to the current Threat Level.
 Scenarized enemies : draw the scenarized enemy with the corresponding number.
 Threat : move the Threat token by 1 space on the Threat track.
 Ambush : enemies on the location attack immediately.
 Damage : lose an amount of Vitae corresponding to the Threat level.
 Increased visibility : reveal the indicated Location on the table. This gives you a sneak peek of what’s coming !
 Story : draw the Story card with the corresponding number, and read it.
- Other icons: let’s not spoil all the icons here ! But we have covered the basics

Effects triggered during the Reaction phase
Some of these icons are also used as Reaction effects, at the bottom of the Location sheet, on an orange background. If they require you to draw enemies of Story cards, simply decide which of the heroes on the location gets to do it (as there is no First player to enter anymore).
There are a few additional icons, the most common being:
 Alert : if at least one enemy is on the Location, move the Threat token by 1 space on the Threat track.
 Sandglass : add a Sandglass token on the location. These tokens have a variety of effects : it can be used as a countdown (when X tokens are displayed, flip the Location, draw a Story card, etc.) or quantify an effect (lose as much Vitae as the number of tokens, etc).
 B side : Flip the Location on its B side.
- Other icons: you’ll have to play to find out
The B side
If you take a look at the B side of this same location, you can notice that some things have changed :
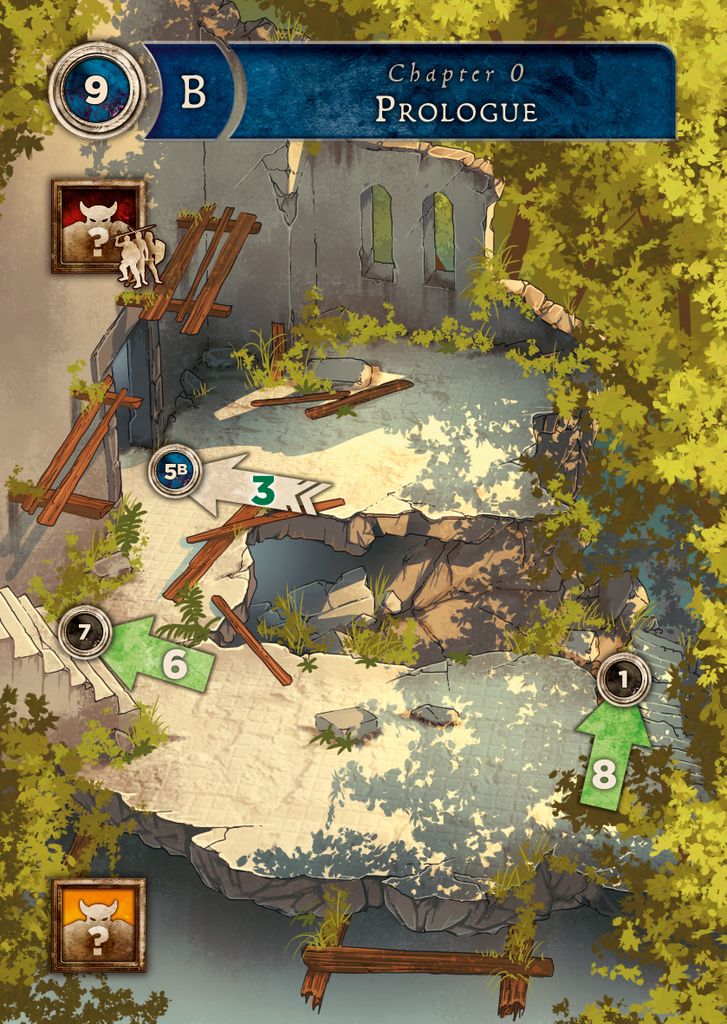
- The grate is now open ! A new path is available, it will lead directly to 5B.
- It looks like you made some noise and attracted attention, or took your sweet time opening the grate, because the Alert Reaction icon is now replaced by reinforcements showing up at the end of each round !
As you can see, iconography has an important place in Soul Raiders. It is combined in numerous ways to symbolize the story unfolding ; for Marc André, it’s a support to the players’ imagination. Not only does it prevent from constantly referring to long paragraphs or a book, but it also allows for a wider variety of interpretations, which is crucial as the characters can come from many different paths to end up in one same situation. While remaining story-driven and narrative, it smoothen Soul Raider’s gaming experience and replayability.
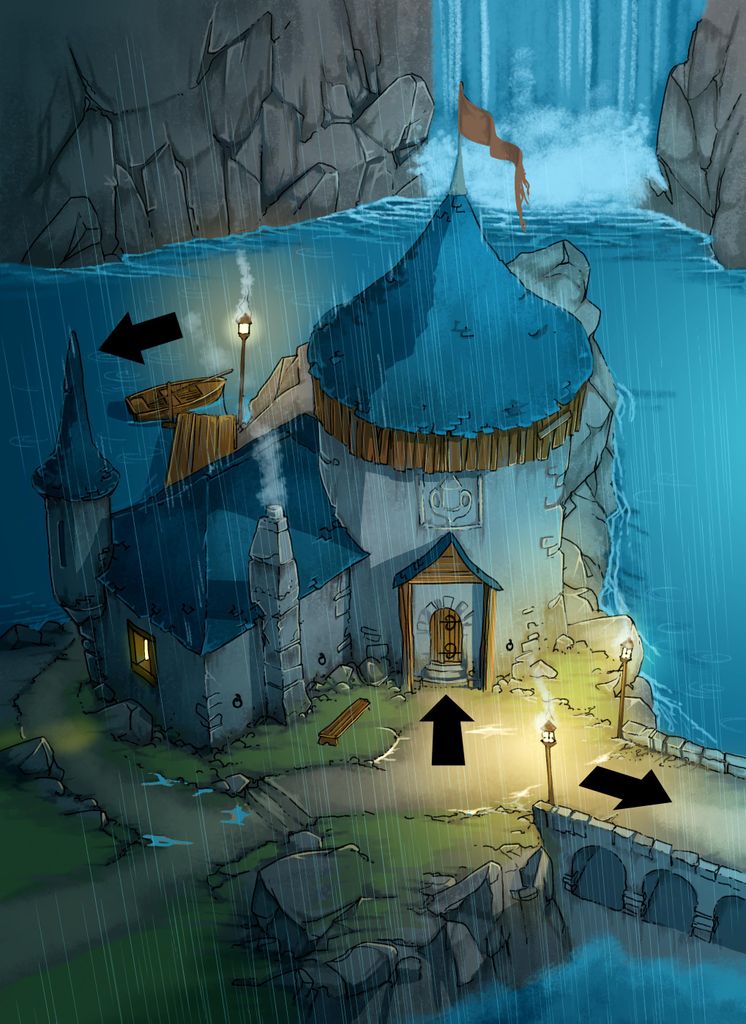
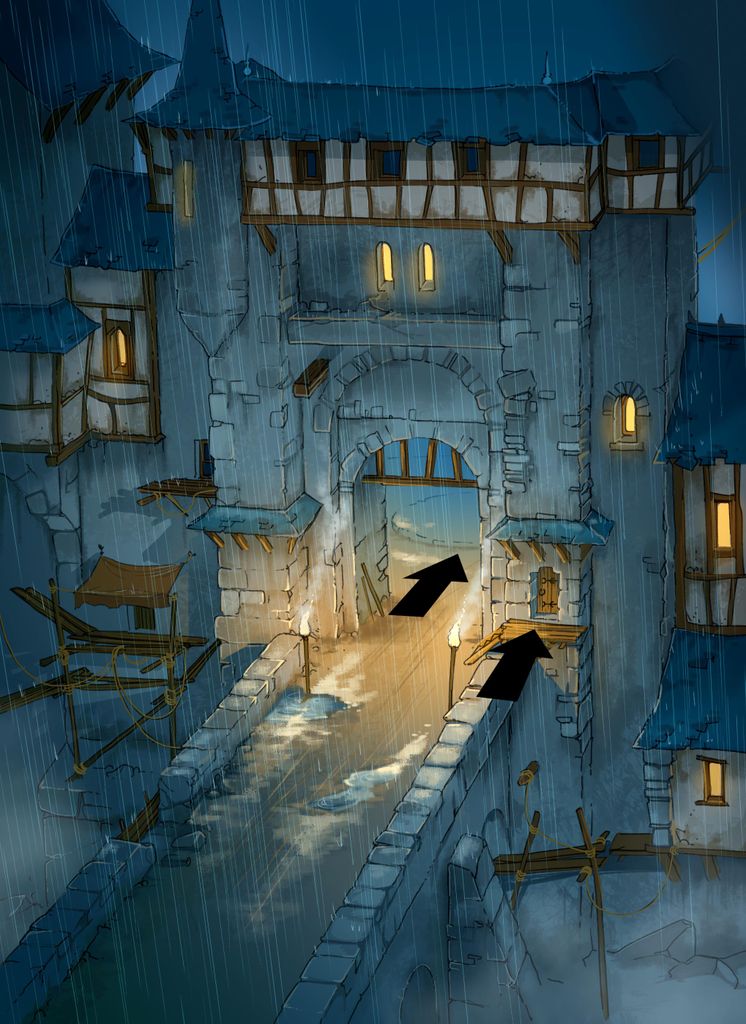
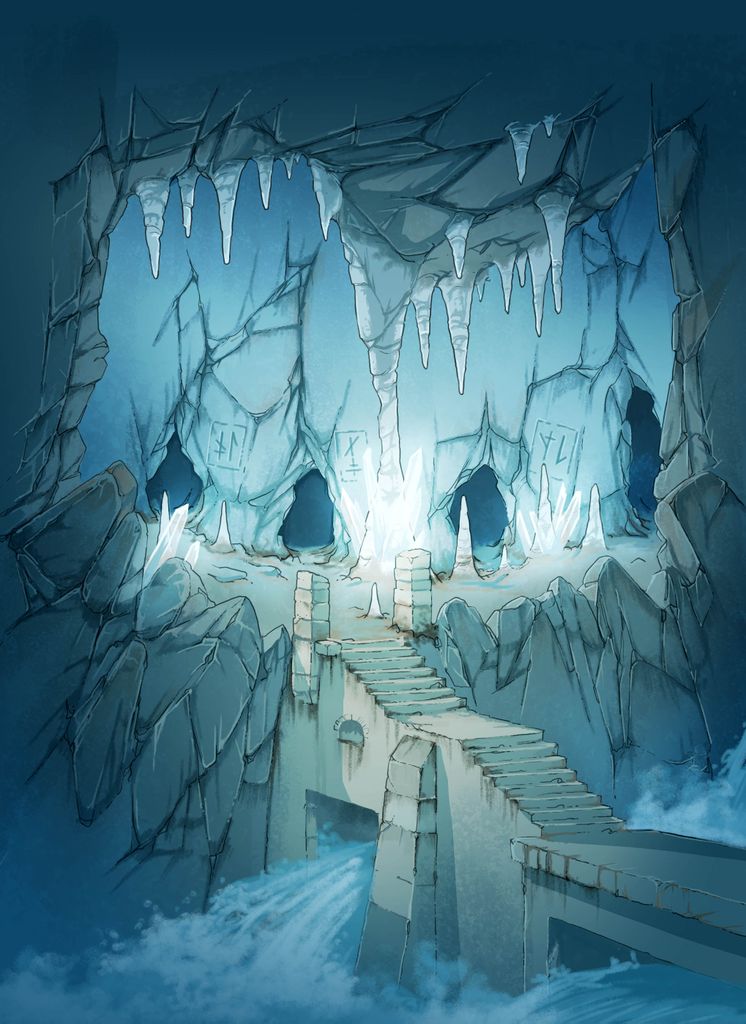
What you’ve seen so far are locations from the prologue, but we’ll leave you with a few illustrations of the first chapters of the game ! Black arrows show the future paths to be added to the Locations
Enemies & engagement
Numerous enemies populate each chapter of the game. As we mentioned previously, they will appear either through Locations or Story cards.
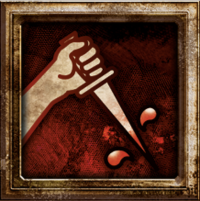
Random enemies are drawn when you encounter this symbol.

The current Threat level indicates how many enemies must be drawn from the deck.
Scripted enemies are drawn where you encounter this symbol.
Simply look for the corresponding number in the deck of Scripted enemies and place the card(s) into play.
As soon as an enemy is drawn, it is engaging:
- The hero who triggered the effect (by entering a location or drawing a Story cards).
OR
- A designed hero in the Location, if no one specifically triggered it (see the Reinforcement Reaction from our previous post).
Place the enemy card in front of the personal board of the engaged Hero.
As long as a Hero is engaged by an enemy, they cannot perform Scripted actions (like picking the lock mentioned in our previous post), and the difficulty of Move actions is increased by one for each enemy engaging them.
If the hero leaves the Location, depending on the arrow’s shape and color the enemy will either follow them or be discarded/placed back in their deck.
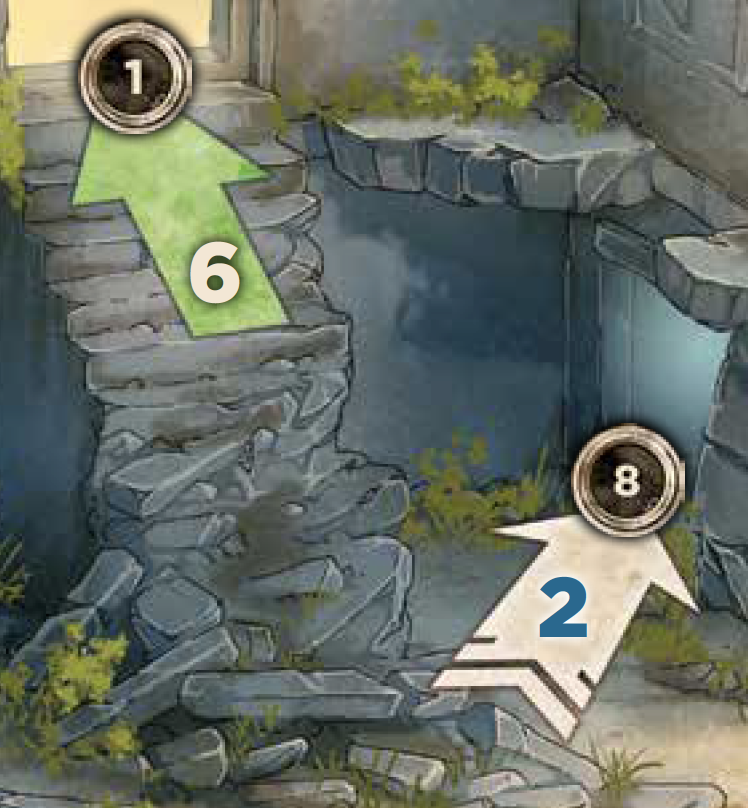
Exemple: A Soul Raider engaged with 2 Enemies can flee to location 1 (green arrow) for 8 action points (6+2 enemies) and will not be followed as their foes will struggle to climb the broken stairs. They can flee to Location 8 (neutral arrow) for 4 action points (2+2 enemies), but the enemies will stay engaged with them and in front of they Hero board.
Note that if enemies cannot follow a Hero in their new location while another friendly Hero remains in the current location, they will jump on them instead of being removed !
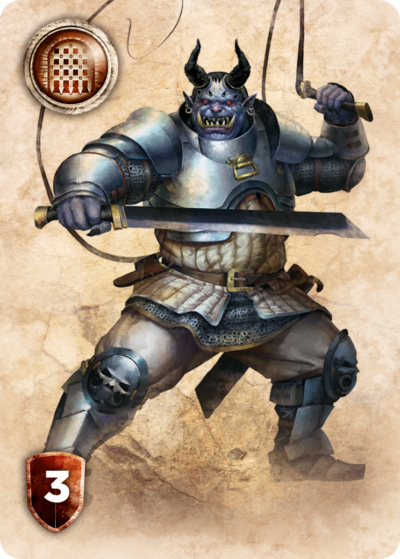
Anatomy of an Enemy
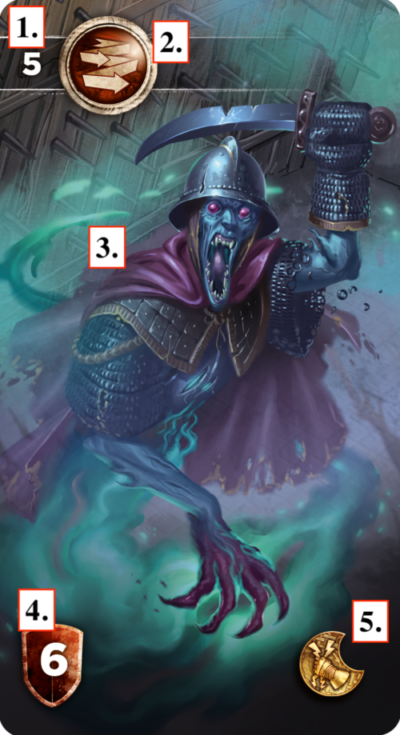
An enemy card displays several informations :
- Its card number – only if it is a Scripted enemy
- One or several Abilities (we will cover them in a separate thread)
- The pretty picture
- One or several shields with a combat value
- Potential effects when it is vanquished (here, get one Heroism token)
To vanquish an enemy, you have to break all its Shields. To break a Shield, you have to match the combat value displayed inside it, therefore placing a Wound token over it.
Any number of Action cards from a single Hero can be combined to match the combat value of any number of engaged enemies, meaning that you can (and you will!) triumph from several enemies with one single sweep of your sword !
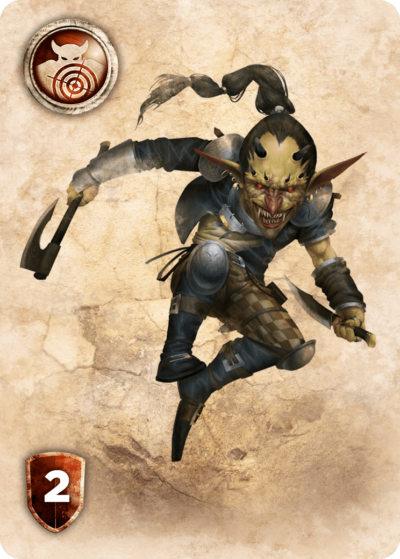
Example : If you totalize, in one or several action cards, an action value of 5 or more, you can dispatch these two foes in one strike!
However, if the enemy card displays several shields, you need to break them with separate Attack actions, and only the combat value of the leftmost Shield is used for each attack. As the Wound token will cover this leftmost Shield, the new combat value of the enemy will be the next shield in line.

Example: to get rid of this stonger opponent, you need a first Combat action to match its combat value of 5 with one or several action cards, and then you need another Combat action (using one or several cards) to match its combat value of 4.
An enemy with only one Shield is instantly vanquished — no need to place a Wound token, simply discard it.
When an enemy is discarded, apply any effects displayed on the bottom right corner of the card. Typical effects will earn you Heroism tokens (more on that in a future post) or make you draw a Story card.
Note that you can attack enemies engaged with another Hero on the same Location only if you are not engaged yourself. These enemies stay engaged with the other hero, so you can strike at them safely while your friend keeps them busy !
Reminder : how do the enemies fight ?
We have covered it in our previous posts, but here is a reminder : whether they appear during the Hero’s action phase or in the Location Reaction phase (step 4), enemies do not fight immediately ; they will only attack heroes during step 3 of the Reaction phase.
Exception: The Ambush icon or some Enemies’ abilities can trigger enemy attacks out of their Reaction phase.
An attacked hero will lose a number of Vitae points corresponding to the number of visible Shields on all the enemy cards engaged with them (Shields covered by a Wound token do not count).
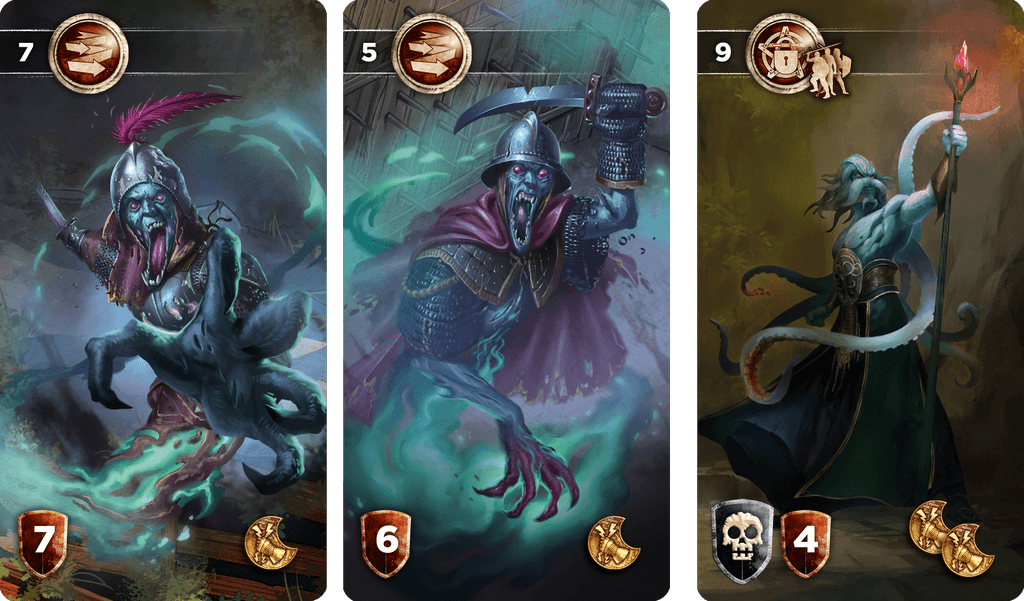
Example: During the Reaction phase, the player will lose 3 Vitae (1 per visible Shield; the sorcerer is wounded and only its rightmost Shield is visible)
That’s all for today! Enemies might also have various Abilities that will affect these generic rules, and we will cover them in a separate thread. As always, managing your hand of actions and knowing when to fight and when to run (let’s call that a “tactical retreat”!) is crucial to achieve your goals as a valiant Soul Raider. Talk to you soon!
Hero decks & asymmetry
Each Soul Raider has a unique deck of cards and abilities. You can browse all their decks in Tabletopia, but let’s highlight some of their specificities here!
Action cards
All heroes have the same three types of Action and Heroic Action cards: bonuses to combat, movement, and spells. The core of all decks has a similar repartition to make sure that all of them can do anything, but the type and value of bonuses differs from one hero to another as some are more combat-oriented and others more agile.
Being more focused on swordsmanship, Eneko and Maïder also have two more combat cards than Zia and Adonis, who have two extra spells.
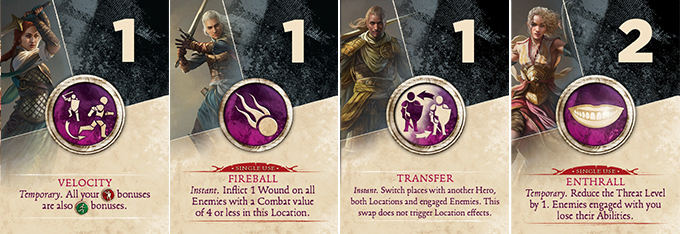
Spells
Speaking of spells, all Soul Raiders know three main ones: Teleportation Portal, Invisibility, and Lightning Bolt. But beyond these staples, each hero has a unique magic arsenal:
- Zia can summon more lightning bolts that her peers (3 spells in total), and make them even deadlier when it synergizes with Weaken. Velocity emphasises her speed while Foresight can provide useful informations to her team.
- Eneko is all about firepower: conjured arrow and the mighty (but single-use) fireball can remove powerful enemies or swarms of lesser foes, while Apathy helps him greatly to remove annoying abilities like Priority target or Guard.
- Adonis is the sneakiest of all: a second Teleportation Portal allows him to spawn even more shortcuts in the chapter, but he can also Transfer his position with another hero or Teleport himself without the need of a portal. If he still ends up stuck in melee, an extra Lightning bolt or Fury should do the trick.
- Maïder is the protector of the team: Arcane Healing and Enthrall gives a lot of breathing room to your party, while Force Field and her greater number of combat bonuses allow her to face the most dangerous threats whithout flinching!
Heroic Action cards
Heroic Actions are designed with the same asymmetry in their unique decks. Each hero will benefit from different bonuses and spells, which either reinforce their strenghts or widen their options to face adversity. Maïder will surely welcome a second Arcane Healing, while a Zia casting Fury can turn in a storm of deadly steel !
Hero faculties
Even if its not related to their deck of cards, it is worth noting that Soul Raiders also have different bonuses for scripted actions. For instance Eneko has +3 in Strength and +1 in Precision, while Maïder benefits from +3 in Persuasion and +1 in Perception. This is another feature that differentiates your heroes, and might impact your choice of characters when it is time to start a new game session!
Read more about Soul Raiders
 https://www.soul-raiders.com/wp-content/uploads/2021/08/Location0-Chapter1.jpg
986
700
admin9772
http://www.soul-raiders.com/wp-content/uploads/2020/12/Logo-Soul-Raiders-340x156px-1.png
admin97722021-08-31 17:10:202021-08-31 17:33:58Chapter exploration and Quest cards
https://www.soul-raiders.com/wp-content/uploads/2021/08/Location0-Chapter1.jpg
986
700
admin9772
http://www.soul-raiders.com/wp-content/uploads/2020/12/Logo-Soul-Raiders-340x156px-1.png
admin97722021-08-31 17:10:202021-08-31 17:33:58Chapter exploration and Quest cards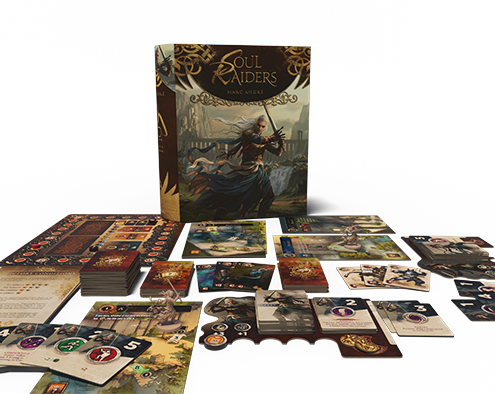 https://www.soul-raiders.com/wp-content/uploads/2021/08/SoulRaiders_ImmersiveView_Mid01_700px.png
394
700
admin9772
http://www.soul-raiders.com/wp-content/uploads/2020/12/Logo-Soul-Raiders-340x156px-1.png
admin97722021-08-31 16:48:262021-08-31 17:34:42Save Systems
https://www.soul-raiders.com/wp-content/uploads/2021/08/SoulRaiders_ImmersiveView_Mid01_700px.png
394
700
admin9772
http://www.soul-raiders.com/wp-content/uploads/2020/12/Logo-Soul-Raiders-340x156px-1.png
admin97722021-08-31 16:48:262021-08-31 17:34:42Save Systems https://www.soul-raiders.com/wp-content/uploads/2021/03/Soul-Raiders-Banner-Article-Enemies-scaled.jpg
1132
2560
admin9772
http://www.soul-raiders.com/wp-content/uploads/2020/12/Logo-Soul-Raiders-340x156px-1.png
admin97722021-03-30 17:10:012021-08-31 17:36:19Know your enemies
https://www.soul-raiders.com/wp-content/uploads/2021/03/Soul-Raiders-Banner-Article-Enemies-scaled.jpg
1132
2560
admin9772
http://www.soul-raiders.com/wp-content/uploads/2020/12/Logo-Soul-Raiders-340x156px-1.png
admin97722021-03-30 17:10:012021-08-31 17:36:19Know your enemies